The water heater replacement was truly not that bad. i DO recommend disassembling the dinette seat! By doing this you can lean in on the rear of the water heater and heat exchanger hoses. I had very little spillage as I took a couple 6” pieces of hose and plugged them with a 5/8” bolt and clamped. Then when I pulled the heat exchanger hose from the water heater, I was able to slide these on. Then a 5/8” bolt on the heat exchanger hose. Also, PIG MATS are a must! These absorbed any coolant leakage. At engine, same routine followed. remove hose from fitting, put plugged hose on fitting and clamp. PIG MATS! Upon examining the hoses, (original 30 years old ) they were still pretty pliable, however, I was in there and didn’t want to go back over a blown hose, so both were changed out. There was only 1 tie wrap I was not able to replace.
heater Seaward 1100 dropped into the hatch under the dinette. Pull and tug, and slide into position. LOTS of room (inch plus on each side!) screwed it down, hooked up rear heat exchanger hose. Then back to the engine room and connected the hoses to the engine. (If I did it again, I would have filled the hoses with coolant before connecting them. Then wired it up, and started the engine. coolant dropped a bit but nothing as I thought it would. However, after bringing the engine up to temp for a few cycles, i shut off and loosened the clamps on the rear of the heater where the hoses meet heat exchanger. Coolant came out of both. Ran up to temp a few times more and added another pint of coolant. Hoping it drops overnight a bit. Painted it also.
Took the old heater apart, found it was a bottom seam leaking. When I dumped the heater out, it was like a beach came out! Unknown where all that sand came from.
Water heated well with heat exchanger, and also electrically. Total time from start to end was approx 6.5 hours. Like I said, no it a bad project at all!
PS : Start at the bottom for the pictures, They were added in reverse!
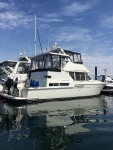
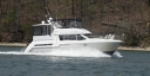
1994 390CPMY water heater replacement
-
tonyiiiafl
- Admiral

- Posts: 902
- Joined: November 19th, 2015, 4:00 am
- Vessel Info: 1994 Carver 39 Cockpit Motor Yacht
- Location: Cape Cod, MA
- Has thanked: 601 times
- Been thanked: 193 times
1994 390CPMY water heater replacement
You do not have the required permissions to view the files attached to this post.
-
Viper
- CYO Supporter

- Posts: 6266
- Joined: July 10th, 2015, 9:58 pm
- Vessel Info: 1989 Carver 3807 Aft Cabin
- Location: Ontario, Canada
- Has thanked: 475 times
- Been thanked: 1791 times
Re: 1994 390CPMY water heater replacement
6.5 hours? Your typical boater would tell me it should only take me half an hour to replace their water hear, right? 
Good job Tony
Good job Tony
-
g36
- Admiral
- Posts: 2115
- Joined: April 7th, 2014, 6:07 pm
- Vessel Info: 1997 Carver 405
- Location: Soddy Daisy TN.
- Has thanked: 7 times
- Been thanked: 654 times
Re: 1994 390CPMY water heater replacement
I had to replace mine a few years ago, also bottom seam it was oem from 1997. The "sand" is calcium buildup that lies in the bottom of the heater. you'll also have this build up at home and it's really a good thing to try and flush some if this out using the drain valve on the water heater occasionally.
1997 Carver 405
Crusader xli
The Black Pearl
Soddy Daisy Tn.
Crusader xli
The Black Pearl
Soddy Daisy Tn.
-
tonyiiiafl
- Admiral
- Posts: 902
- Joined: November 19th, 2015, 4:00 am
- Vessel Info: 1994 Carver 39 Cockpit Motor Yacht
- Location: Cape Cod, MA
- Has thanked: 601 times
- Been thanked: 193 times